Thursday, December 16, 2010

Bellies to Babies

It seems as if everywhere I look I see another blossoming belly on another glowing mom-to-be. I love a large, pregnant belly (as long as it's not mine) and I especially love the look in the eyes of the parents-to-be as they talk about their plans for their new little one. In honor of all these moms who can barely bend down to put on snow boots this winter (and thankful I'm not one of them this year!) we've decided to offer a special deal for these marvelous women:

Get a FREE Maternity (Belly) Session when you book us for your little one's newborn photos.

A newborn session includes the following:
- A complimentary 30 minute in-hospital session
- A 2-4 hour in-home session
- 3 Baby brag books
- An online gallery of images to view and order prints
- A DVD of high resolution images to print and share.


Now for a little more explanation because I know you're bursting with questions!

The in-hospital session.  The idea for offering this came from my extreme disappointment with our hospital "photographer" when my first son was born. Simply put, they were terrible and very blah. They lacked creativity and just did not speak to me. 

We offer this complimentary service (meaning, if you want it and we're available, we'll be there, but if we happen to be out of town or photographing a wedding, etc it has no monetary value or "trade" value. It is exactly as stated, a complimentary service - but I will do everything in my means to be there. I promise.) because I want new moms (and new moms again) to have images they absolutely LOVE of their little one before they ever leave the hospital. We then post a sneak peek to facebook for tagging and sharing your bundle of joy with all of your loved ones.

The hospital session usually lasts about 30 mins. I usually focus more on the incredible love shared with the new family addition that is unique to the first few days after birth and leave the more time-consuming "sleeping" photos for the newborn session.

The newborn session.  This usually occurs within the first 2 weeks because that's when baby sleeps the most and is easiest to "mold" into the adorable newborn poses we all love so much. Around that 2 week mark, they also don't curl up into the fetal position as tightly - meaning their legs won't stay tucked and shots of the cute bottom in the air become much more difficult.

You may wonder why newborns can take up to 4 hours photograph. The answer is simple - newborns are unpredictable! Believe it or not, I haven't met 2 that were the same yet. The time varies so much because it depends on your baby; her mood, if she's hungry and needs to be fed, needs a diaper change, is sleepy and cooperative or just plain cranky and takes a while longer to make her happy, contrite and fall back asleep. This leads me to why we do this in your home - baby is happiest and most comfortable in a familiar setting. I don't care if you have a gorgeous mansion or a humble little cottage. I don't care if you are exhausted and it's not spotless. I've had 2 children - I understand. We'll work with it. Don't stress about it. Let me work my magic and give you images you will fall in love with and cherish forever.

Brag Books. These are adorable and one of my favorite products. This is a super cute little accordian-style fold-out book, approx the size of a wallet. It includes about 10-12 of your favorite images and is custom-designed by the most incredible designer I know - Carl. :) You will absolutely LOVE these books and because you get 3 of them, they're perfect as gifts for grandparents as well!

Online gallery. After we work our magic on your images, they are uploaded to a private gallery with our lab, Pictage. You will have a private link to share with friends and family from which you may order prints of various sizes.

DVD of images. You will receive a DVD of all of your edited images - from the hospital and your home. Keep this DVD safe and treat it like you would film negatives. One little perk over old film negatives, though, is that you will be able to print these from home computer or you may take them to a professional lab of your choice. You will be given a copyright release for personal use.

All of this for your little angel is only $300. But if that's not enough of a bargain on it's own, take advantage of the FREE belly pics now (a $200 value). This includes 2-3 hours of photography in your home or at another location of your choice. The best time for these photos is approximately your 7th or 8th  month, or when you're already nice and round, but not so close to the end you are totally exhausted and not wanting photos. Include the baby's father and any siblings as well. What a GREAT way to remember this time of your life. The glimmer in your eyes and the anticipation on your face (even if you don't think it's there) will shine in your images and you will love and treasure them.

As with all of our lifestyle sessions, this is about you and what's important to you. We never limit the number of participants in the photos, but we do require that if it's belly pics the mom-to-be actually be in the photos or newborn pics, we must include the baby in the photograph. Aside from that - include grandma, grandpa, siblings, etc. Take advantage of this opportunity to update your family photo as well! Please keep in mind, the more participants involved and the more onlookers present, the longer it often takes to coordinate and capture the perfect picture and you may receive less images. Let's keep things simple. We like it that way.

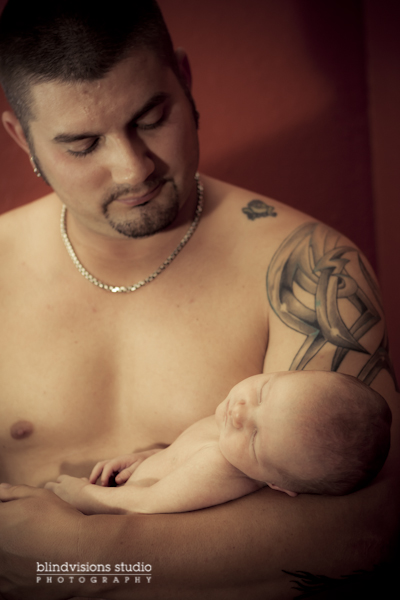
I am including a few images here for you to view and fall in love with, but please, take some time to view our website gallery at www.blindvisionsstudio.com and check out some of our most recent work on facebook at www.facebook.com/blindvisionsstudio.


Sunday, November 7, 2010

Memory Loss!! The Art of Proper Data Storage.

The other day while at Best Buy, taking a long hard look at the iPad (whimper), I over heard a person asking an employee how big the hard drive is and how stable it is against crashes. I could help myself but listen in to see what the employee would say and the story the woman gave about how her last hard drive crashes and she nearly lost everything and had to pay hundreds of dollars for data recovery on top of paying for a new hard drive. Apparently this employee wasn't one of the good ones and told her what she wanted to hear about the latest tech and how far hard drives have come in the last few years. At the moment I thought to myself what an idiot and he's just trying to hurry the sale along cause he's unsure about is answer.

After all was said and done, I went over and introduced myself to the woman and stated that I over heard her conversation and thought that I could help. I told her that I was a photographer and how storage and memory and keeping it safe was always a problem. What I explained to her was that no matter how far we come with our tech everything is bound to break. Even the new solid state hard drives with no moving parts has a better chance of not crashing, but still can be attacked by viruses and maleware in general. So, I told her how I handle this situation and see if it might be be for her. Here's what I said.

First, the size of your hard drive doesn't matter. What matters is how you use that space. Think of how you will use the computer, i.e. home, business or both. Also consider how many people will be using it. These things will let you know what types of programs you will install and how much space you will really need. Keep in mind you should have plenty of space on your hard drive for breathing room. A 500G hard drive will almost always be more than enough. That's what I have on my iMac and I've not even used a fraction of that with all the graphic and photo editing software I have installed.

Now, you're probably wondering where are you going to put your photos, documents, music, etc. Well, that's why external and portable hard drives and jump (or flash) drives were made. This will give you a safer way to keep those cherished memories away from crashes and prying eyes on the net. Since I use my iMac for both home and business use, I have two external drives, one portable, and a slue of jump drives. Not to mention I keep DVD backups of almost everything. Now I'm not saying you need this much storage, usually one external of either 500G or 1T will suffice for any household. Plus, adding about 3 or 4 jump drives ranging from 8G to 32G will give you flexibility. This setup will run you approximately $200 to $400 depending on what you get. It's a lot better than paying upwards around $500 to $1,000 for data recovery and not being assured you will get everything back, or even using an off site web storage service with a monthly fee.

Well, I hoped this helped will some of the issues we all have when it comes to data storage and keeping our files, music and memories safe. I know this was rather lengthy and full of info, but please read it again and carefully to absorb all the info. If you have any questions regarding this post, please feel free to leave a comment or message me. That should do it and until next time thanks for reading.

Tuesday, October 12, 2010

Lifestyle Portraits: The Style of your Life

As an ICU nurse I am frequently reminded of how fragile life is. Last night was no exception as I watched a patient slowly leave this world to enter the next. I watched his family spend their last few moments with him and say their final goodbyes. I watched and waited, helpless to do anything despite the great advancements we’ve made in science and medicine. I was reminded of how little control we really have over life and death, considering most of my time as a nurse is spent doing everything possible to save lives. I am grateful as a nurse to be such an intimate part of so many lives.

As a photographer of life, I am humbled by this experience. I have the great responsibility to document the celebration of life and the opportunity to preserve those memories. We never know what tomorrow will bring or when our loved ones will be taken from us, but we will always have the photographs to cherish that life and time spent with us.

This is why I am a lifestyle photographer. I photograph life - in context. I photograph people to capture their essence and the relationships between people. Photography to me is not always about the perfect light, perfect exposure, tack sharp images and all the technical stuff (even though that stuff is important!). It’s about the story behind the image, the context of life in which it was shot. It’s the way a man in love gazes at his bride-to-be, the glow of a pregnant woman and the look in her eyes as she stares at her newborn baby, the pride of raising a child and the accomplishment and finishing high school.

These relationships are the stories we create in life and the legacy we want to leave behind. These are the images I strive to capture. As you browse my favorite images, the ones that move and inspire me, you will not always see the faces of my subjects. In fact, if you do see the face it’s probably not looking straight at the camera and smiling. I love emotion - laughing, crying, surprised, angry - it’s what adds life to images and context to the memory. Drab images of anyone looking straight at the camera and forcing a fake smile really don’t do it for me, no matter how attractive the person is.

I’ve been asked on many occasions: Where should we go to get the best photos? How should we sit or stand? Should we hold hands for a better picture? Should we kiss? What if we’re not kissers? How can I get my child to sit down and smile? My answer is simply that I don’t really have the answers to those questions. I don’t want the answers. I want to photograph your life and your passion, not just use you to create an imaginary, idealistic life in pictures. I want your images to remind you of how you felt during this time in your life, not just what you wore and how you combed your hair. So go for the kiss on the forehead or cheek instead, the not-so-sly-yet-intimate-and-sexy glances at each other, the giggles as well as the drool and tears of your baby, let your child run, play and explore and you’ll love the powerful images I can capture when she isn’t sitting pretty and smiling at me. Be yourself - you are my inspiration. Your life in context is my passion. Your relationships are the basis of my creations. How you share your life with others is my obsession and I love every minute of it. Our Lifestyle Portraits are just that - the style of your life and not simply another snapshot. I feel blessed to be able to preserve these most precious memories of your life for you.

I would urge everyone who reads this to think about what memories you are preserving in your photographs - is it just what your loved one looked like, or is it your relationship with that person and a life in context?

Saturday, September 4, 2010

SENIORS! STAND OUT AND GET NOTICED!! (model search contest)

With school in full swing and the temperature beginning to cool, we thought it's time to hold another contest with a chance to win a FREE session. This time it's the seniors turn to show us what they've got.
Since seniors are a different breed, trust me they are, we thought we would do something a little different this time with the entries. Read on to find out more.

Athletes, drama queens (and kings), socialites, mathletes, artists, musicians and others, you all have a story to tell and we want to hear it. When you post a photo of yourself on our facebook fan page, we want you to tell us and the fans why you would make a good choice as our senior model for the year. Please be brief but make it interesting and don't forget to include your name and high school.

Something else we are also doing for this contest, is we will have two winners. Ok, pick your jaw up off the floor and pay attention. There will be one guy and one girl winner. Each will then be used to represent Blindvisions Studio for the entire school year. One more thing, this contest is open to only 2011 seniors. Although if you're one of those over achieving seniors graduating in December, we'll let ya' enter as well. Crazy kids.

Voting will be the same as it has been over the course of the contests. You will need to already be a fan or become one by hitting the LIKE button. Once you've done that and uploaded the photo, you should then LIKE that photo and then get others to vote. Anyone you want to vote will need to become a fan and then LIKE your photo. And as we've tried to do in the past, we would like to get all our visionaries to vote on their favorite senior. It's all about being "social" and having fun.

Now as an added bonus, we thought we would also do something for those who don't feel like entering the contest. Starting Sunday, September 5, we are going to offer 30% OFF all of our Senior Life Collections until Saturday, September 11. You don't have to have your session done within that time, just simple book the shoot and schedule it for a more convenient date. Download our pricing guide here to check out our products and services.

Please do not submit professional photos of yourself or your senior. We will know and will disqualify you from the contest. If the photo was taken by some one other than yourself, that's fine. Also please read all the rules/terms and conditions carefully, we don't want to disqualify anyone. This is simply meant to be a fun contest for all to enjoy.

Time for the boring, yet important, Terms and Conditions: Contest only applies to those fans that reside in the Greater KC Metro area. Contest will end on Midnight CST, September 30, 2010. Winner will be notified via Facebook on October 1, 2010. Free portrait session must be redeemed by October 31, 2010. Session is for The Rockstar session from our Senior Life Collections, which includes 2-3 hours of shoot time, 3 outfit changes, up to 2 locations, online gallery, coffee table book, 25 graduation announcements and a DVD of images. The winner will be featured on our website and in any print or web promotions. Coffee table book is 8" x 8" with a maximum of 20 sides. Graduation announcements are 4"x 5.5" Flat (double sided). Prize has a value of $350. Winners cannot redeem prizes for cash value. No substitutions. Sorry, family is ineligible. We gotta keep it fair.

Whew, with all of that now finally said, it's time to get those photos uploaded and your stories told. I know you seniors are busy, but I think you could find time for a chance to win a FREE photo session. So come on, this is your time to shine! This is Carl Perry with Blindvisions Studio signing off. Thanks for reading.

Monday, August 2, 2010

It's time to Step Up for Down Syndrome - Support Thomas Trekkers today!

Awe yes, it's August! The hottest month of the year as we seem to lose weight by simply standing outside sweating it off. So many things happen during this month; the school year begins, football season is upon us, T.V. stations bombard us with their new fall line up, and we get our donations ready to help support Step Up for Down Syndrome. Wait a minute, you don't know what I'm talking about? It's probably the coolest charity event of the year. On Saturday, September 25 from 9:00am to 1:00pm, thousands shall gather at Arrowhead Stadium to show their support for Down Syndrome. Teams of people shall walk around the stadium to raise money and awareness for Down Syndrome. What a noble and just cause.

Now, here at Blindvisions Studio we thought what a excellent charity to help out with by donating a portion of our portrait earnings. Yep, we will donate $75 from our $200 Lifestyle Portrait Session and $25 from our $75 Lifestyle Portrait Essentials through the month of August. Ok, you can get up off the floor now. This is how it works. Simply buy one of our sessions from the conveniently placed button at the bottom of this post, and we will mail you a gift certificate for the session purchased. You can use the certificate either for yourself, some one special or even as a gift. Christmas is just around the corner ya' know (hint hint). Oh, and the certificates are going to be valid until December 31, 2011. Yeah, I know, it's over a year. Cool, huh?
We should probably let you know that we aren't just going to donate the money to just anyone. We are proudly supporting THOMAS TREKKERS. Thomas, whom as you might know, won our May model search and was such a joy to shoot. How could you not help such an adorable little man. His smile just melts your heart. So please help his mom, Sara and her team by purchasing one of our sessions and help this little dude. Follow this link to find out more about Step Up for Down Syndrome and Thomas Trekkers. Plus, follow us on Facebook for updates.

Finally, many of you might be wondering about this months contest and there will not be one. Instead, we will be focusing on Step Up for Down Syndrome and Thomas Trekkers. However fear not, we will be offering more contests in the future. Watch for more details on this in the next few weeks.

Well fellow visionaries, that will wrap up the lovely blog post and give you your fix of Blindvisions Studio. Now, click on that big yellow button below and order your session TODAY! Thanks for reading.


Choose Your Session


If you would like to donate to this awesome cause without purchasing a gift certificate, you may do so here:


Friday, July 2, 2010

Get those Kids Ready!! (Model Search for Ages 5-8 years)

Yep you guessed it, it's that time again. Time to get those 5-8 year olds a chance to shine and show their stuff. We are just having way too much fun having these contests. So starting July 2nd, get those kids up on our fan page and let the carnage, I mean voting begin!!

Voting will be the same as last time. You will need to already be a fan or become one by hitting the LIKE button. Once you've uploaded the photo, you should then LIKE that photo and then get others to vote.

Please do not submit professional photos of your kids. We will know and will disqualify you from the contest. If the photo was taken by some one other than yourself, that's fine. Also please read all the rules/terms and conditions carefully, we don't want to disqualify anyone. This is simply meant to be a fun contest for all to enjoy.
Time for the boring, yet important, Terms and Conditions: Contest only applies to those fans that reside in the Greater KC Metro area. Contest will end on Midnight CST, July 31, 2010. Winner will be notified via Facebook on August 1, 2010. Free portrait session must be redeemed by August 31, 2010. Session is for the Lifestyle Portrait session, which includes 2-3 hours of shoot time, 3 outfit changes, up to 2 locations, online gallery, and a DVD of images. The winner will be featured on our website and in any print or web promotions. Coffee table book is 8" x 8" with a maximum of 20 sides. Prizes have a combined value of $350. Winners cannot redeem prizes for cash value. No substitutions. Sorry, family is ineligible. We gotta keep it fair.


Thanks for reading

Thursday, June 17, 2010

Introducing "Share-A-Shoot"

In this economic down-turn, we here at Blindvisions Studio have come up with a way to allow you awesome photography at a manageable price. How can we do this you might ask? It's simple, with our new Share-A-Shoot option you can now invite others to share the cost of our Lifestyle Portrait Session.

Alright, let me break it down for ya'. Say you really want a portrait session from us, but the $200 price tag is causing serious budget break and loss of hair. Well with Share-A-Shoot, get one of your friends to go in on it with you. That's now only $100, half the price. Plus, you could even get three of your friends making the price a mere $50 for each family. Now how could you go wrong with that.

We're sure some questions are popping up in your head and we will try and answer some of them right now. First off, let's go over what a Lifestyle Portrait Session includes: 2-3 hours of session time, 3 outfit changes, Online gallery and a DVD of high-resolution images. Now time to translate that into the Share-A-Shoot option. The session time will remain the same and be split among the number of clients for that session. So if there are three clients, each client will receive approximately one hour of the session. You are still welcome to bring additional outfits, but remember that will eat up more time. There will only be one online gallery for the entire session. So all clients will be included. And now for the all important DVD. The session only includes one DVD of all the clients and each client will have 25 edited high-resolution images for the disc and online gallery. Copies of the DVD may be purchased for and additional $15. We believe that takes care of the stipulations and answers some questions. If you have further questions, feel free to contact us.

We feel this is a great way to get those pesky family photos you've been putting off and get them outta the way. Not to mention, you now have family photos for Christmas Cards that you can order through us. Also, what a great way to involve extended family and get everyone into a photo. Now these session do not have to be strictly family, they can be just the kids, you and your siblings, or just you and your closest friends. It's whatever you feel is important to you.

So go on and look through your Facebook friends list and start chattin' the Share-A-Shoot up to see who's interested. I bet you'd be surprised. And as always from Blindvisions Studio, thanks for reading.

Tuesday, June 1, 2010

It's Toddler Time (Model Contest for 2-4 years old)

We had had such an awesome turn-out for the May contest we thought we would try it again. However, this time will be for the toddlers, ages 2-4 years, and many of the same rules will apply with some exceptions.

First off, we need to make things perfectly clear when it comes to voting. YES, you will have to either already be a fan or become one in order to vote. This is Facebook's thing not ours. Personally we feel that is insane, but we have no control over that. So if you want to become a fan just to vote and remove yourself later that's fine, we understand and will not hold that against you, much.

Now with that said, we are also changing the way you vote. Instead of leaving a comment for your vote, all you need to do is click the LIKE link under the toddler you are voting for. This will make the voting easier and allow everyone to vote only once without any confusion, since you can only LIKE something once. You can still comment all you want, it just won't count as a vote.

Finally, let's get those cute photos of your toddlers up on our fan page wall and let the voting begin! Please do not submit professional photos of your kids. We will know and will disqualify you from the contest. If the photo was taken by some one other than yourself, that's fine. Also please read all the rules/terms and conditions carefully, we don't want to disqualify anyone. This is simply meant to be a fun contest for all to enjoy.

We would like to thank all who participated in last month's contest making it a great success and wish those who enter this months GOOD LUCK!!

Time for the boring, yet important, Terms and Conditions: Contest only applies to those fans that reside in the Greater KC Metro area. Contest will end on Midnight CST, June 30, 2010. Winner will be notified via Facebook on July 1, 2010. Free portrait session must be redeemed by July 31, 2010. Session is for the Lifestyle Portrait session, which includes 2-3 hours of shoot time, 3 outfit changes, up to 2 locations, online gallery, and a DVD of images. The winner will be featured on our website and in any print or web promotions. Coffee table book is 8" x 8" with a maximum of 20 sides. Prizes have a combined value of $350. Winners cannot redeem prizes for cash value. No substitutions.

Thanks for reading.

Tuesday, May 4, 2010

The New Top Model Search (for the 3 - 23 months crowd)

We here at Blindvisions Studio have been locked in think tank mode trying to give you, our adoring Facebook fans, bonuses for helping us spread the word. And offering free photo sessions seems to be doing the trick. So in the coming months, we will be focusing on certain age groups to be used as our featured model. This person will then be featured on our website and in any print or web promotions.

May is Infant month for those between 3 to 23 mos.

Here's how it works. Starting right now, you can upload your babies, those in the fore mentioned age group, photo to our Facebook fanpage wall and then get your friends to vote on that photo in the comments. When the contest ends, we will tally the votes and the winner will receive a FREE Lifestyle Portrait Session of their little one. Plus, as a BONUS for being our model, you will also receive a FREE Coffee Table Book of your favorite images.

So why are you still sitting there? Get out your cameras and start shooting! If you have more than 1 baby in this age group (heaven help you!), you may submit a photo of each kid, but only one photo/submission per child, please. Oh and BTW, please do not submit professional photos of your kids. We will know and will disqualify you from the contest. Please have fun and play fair. Don't make me get my belt!

Time for the boring, yet important, Terms and Conditions: Contest only applies to those fans that reside in the Greater KC Metro area. Contest will end on Midnight CST, May 31, 2010. Winner will be notified via Facebook message on June 1, 2010. Free portrait session must be redeemed by June, 30 2010. Session is for the Lifestyle Portrait session, which includes 2-3 hours of shoot time, 3 outfit changes, up to 2 locations, online gallery, and a DVD of images. Coffee table book is 8" x 8" with a maximum of 20 sides. Prizes have a combined value of $350. Winners cannot redeem prizes for cash value. No substitutions.

That should do it for now. Keep checking back for new specials and contests that could give you great photos for nothing or next to nothing. Hey, you're wonderful. Thanks for reading.

Wednesday, April 14, 2010

Up and Coming Summer Specials

Okay, with spring in full swing and the summer season fast approaching, I think this would be the perfect opportunity to let you know about a few of the specials and even a couple of contests we will have going on during the season. I can tell you're excited already. Who wouldn't be.

Now if you've been keeping up with our posts, and if you're not shame on you, you should remember the senior special we started for the months of April and May. It's a great deal at 40% OFF. Look through the April archives for complete details.

I know it's kinda hard to top a special like that, but what if I tell ya' we're gonna give away a complete Lifestyle Portrait Session. Yep, you read right, a $200 portrait session could be yours. Now what is a Lifestyle Portrait session you might ask, well it's a representation of you, your family, your life. It includes, 2-3 hours of shoot time, 3 outfit changes, up to 2 locations, online gallery, and a DVD of Images. So now you are wondering how does one enter this wonderful contest, simply become a fan on our Facebook page. Once we have reached 100 fans, we then hold the drawing for the winner. If you are already a fan, great there's nothing you need to do; however, we would like you to invite your friends to fan us. The faster we reach 100, the faster you could win a FREE Lifestyle Portrait session. So come on, whatcha waitin' for, an Earth destroying asteroid? Well by then it will be too late. Help us, help you.

Time for the boring, yet important, Terms and Conditions: Contest only applies to those fans that reside in the Greater KC Metro area. Contest will end on Midnight CST, April 30, 2010. Winner will be notified by Facebook message on May 1, 2010. Free portrait session must be redeemed by May, 31 2010. Session is for the Lifestyle Portrait session only. No substitutions.

That should do it for now. Keep checking back for new specials and contests that could give you great photos for nothing or next to nothing. Hey, you're wonderful. Thanks for reading.

Tuesday, April 6, 2010

White shirts and blue jeans? NO WAY!

Matchy-matchy families all dressed in black? How about kids buttoned-up and miserable? I don't think so!

What I'm talking about is the proverbial question we, as photogs, get asked a lot. "What should I/we wear?" And the answer is whatever makes you feel comfortable and makes you feel like you. Now if that is white shirts and blue jeans, well by all means wear them; however, keep this in mind when you book one of our portrait sessions they are anywhere from two to three hours which gives you plenty of time for at least one other outfit change.

We need to step away from the norm and the conformity that the fashion industry and those big chain photography studios' have pushed upon us. Sorry, it the artist in me that is coming out and the struggle to make my own rules. When it comes to the arts there are guidelines and techniques that should never be ignored and then there are those guidelines and techniques that can be bent and even broken. I'll get off my soapbox now and get back to the blog.

When it comes to choosing the perfect wardrobe for you photos, don't panic and think all you can do is go out and buy everyone a black button-down shirt or polo and think black goes with everything, because it doesn't. Neither does white. As location photogs, the entire metro area is our backdrop full of wonder full colors and textures. And what better way to make use of them with colors and textures of your own.

Lesson time. Now as a graphic designer, color theory is something I took very seriously and studied constantly. The wrong color combo could lose the job. Here's a very basic color lesson about complementary colors. These are the colors that are across from each other on the color wheel and make their compliment color pop. The basic pairings are Blue & Orange, Yellow & Purple, Red & Green. Have you ever wonder why a brick building surrounded by trees set against the sky really stands out and yet looks like it belongs there. The answer is in the bricks. The reddish-orange serves as a compliment to the blue sky and then to the green trees. This whole theory then works on clothes as well. Forgive the long drawn out explanation, but it could be helped.

Another piece to the puzzle is texture. Everything has some sort of texture and this gives us our depth and sense of our three-dimensional world. Thus in turn, gives a photo dimension. Make your photos standout and want to be admired. Leather, linen, cotton, denim and silk all have something to bring to the table. Don't be afraid to bring multiple outfits to the shoot, we'll help you pick out the best ones.

One final thought in the marathon post, is layering. Teens and tweens are already doing this and so should mom and dad. It doesn't have to be anything to extreme, but polo or button-down with the top two buttons opened and showing a t-shirt will do just fine. Be bold. Be daring. Be you.

Whew, I think this is the longest post I've done to date. Hands are cramping, so if you have any questions, please ask and as always thank you for reading.

Thursday, April 1, 2010

HEY SENIORS! CHECK OUT THIS SPECIAL!

In case you've missed it in the previous post, we are running a huge special for all 2010 high school seniors and juniors. And when I say huge, I mean 40% OFF all Senior Life Collections. This is a savings up to $320! Are you a senior or junior, or some one who knows one that is looking for awesome contempary photos? Well look no further, because through the months of April and May we are booking sessions at the fore mentioned 40% discount. Do I sound like one of those pitch men on T.V. yet? It's what I'm going for. Of course with respect of the late Billy Mayes.

Now, what does this mean you ask? Simply put, you contact us by either phone, email, facebook or even shout it through a huge megaphone and set up our free consultation and then book us for any date from now until May 31, 2010 and you get 40% OFF any one of our Senior Life Collections. Simple, heh.

The reason we are doing this insane discount is that it's the begining of both wedding and senior photo season. It's the opprotunity to use this start up time for great savings, because once June hits and we're in full swing, you will pay full price.

So act now any get your senior photos done by a professional photography studio at a Wal-Mart photo studio price! The last official day to book your session is May 22, 2010.

Okay, I think that should be enough cheesey hype to get your attention. So take a look at our gallery, and then give us a ping. This is the time for seniors to stand out and remember the moments before they step off into the future and Blindvisions Studio wants to capture that time. Thanks for reading.

Monday, March 29, 2010

We're BAAAAACCCCCCKKKKKK!!!! WATCH OUT!!

Yes, yes we've been away for a while, having a baby and everything that goes with it. Whew, talk about having your hands full with a newborn and a toddler who is having issues with the changes that come with having a cute baby brother. Plus, being sleep deprived does not help much either. We should have some gorgeous newborn photos of our little one soon. Now on with the post.

One thing that you might have noticed is the new format and design. This is something we've been wanting to do for a while, but had little time for. I told you changes would be coming. Tell us what you think. Something else that has been improved upon, are various areas of our website. Like alerting you about specials, which currently has to do with high school senior photos. Check it out here. The other addition is our new and improved Product & Pricing Guide available for download in a printer friendly PDF. We are still working on the complete site redesign, but we hope to have that up and running soon.

Now for the final part of this post. While I was reading one of our photog mags, I came across these really great tips for applying makeup. Okay, guys this is where you can stop reading if you want OR you could educate yourself and impress the hell out of your significant other. Brownie points anyone! The reason I want to put these tips up is to help those women who are going to apply their own makeup or have a friend do it for you. The tips are mainly directed at brides, but are good for seniors too or anyone else, even guys. All tips are from top makeup artists in the industry. Enjoy.


1. BLEND, BLEND, BLEND. You can use your everyday makeup, but use more than you normally use every day. Many makeup professionals use airbrush makeup, the method of choice for high-definition TV, because of it’s lightweight, waterproof and gives flawless coverage.

2. SOMETIMES LESS IS MORE. Use less makeup for a day wedding and more for evenings. You can get dramatic with eye makeup.

3. DON’T SKIMP ON CONCEALER. Use a moisturized concealer  on the thin, sensitive skin under the eyes. If your concealer isn’t moisturizing, blend it with a skin cream. For blemishes, first treat them with a natural or over-the-counter anti-inflammatory, then cover with concealer.

4. DO A MAKEUP TRIAL RUN.  It’s the only sure-fire, stress-free way to make certain your makeup will look beautiful.

5. NOT ALL MINERAL MAKEUP IS CREATED EQUAL.  Titanium dioxide, a chemical used as a sun block, can reflect flash, giving the bride a ghostly appearance. In 2009 makeup artist Annie May launched a line of mineral makeup especially formulated for photography called Advanced Mineral Makeup. May promises it won’t white-out the bride under a flash.

6. USE WATERPROOF MAKEUP WITH STAYING POWER. You don’t want to spend your reception in the bathroom reapplying your makeup. Foundation, eyeliner and mascara all should be waterproof. And in case you cry (and you probably will), have a tissue or handkerchief handy to gently blot your tears right at the eye.

7. KEEP YOUR LIPS MOISTURIZED AND COLORED.  Dry lips look dreadful in photos. Have someone carry your lipstick for you and touch up often. Matte and gloss lipstick both photograph well, and be sure to use blended lip liner for enhanced definition.

8. DON’T FORGET THE GROOM.  If the groom is red faced due to too much sun (pr drinking), a little powder can help. That goes for shiny heads, too. And it’s a good idea to slip a tube of Chapstick in the groom’s pocket  for his dry lips, as well as a handkerchief to dab well-wishers’ makeup smudges off his suit.

9. DON’T SPRINKLE ON GLITTER.  In photographs, it tends to look like little white spots, as if there’s something wrong with the camera.

10. REMEMBER to apply foundation and powder to your neck, shoulders and decolletage-you want your head to look like it belongs to your body!


Alright, that should do it for this post. All comments are welcome. Thanks for reading.

Friday, February 12, 2010

The Basics of Digital Photography: Part 4

Yes, I hear you screaming at your computer and throwing out some choice words about the final installation of Basics of Digital Photography. What can I say but absolutely nothing. Been busy editing photos, designing new sample products, and playing with some new toys. yea! Well, here's you've been waiting for, so enjoy. Oh, and about posting on Wednesdays, well I see that as more of a guideline and not a hard fast rule. :)

IV. Composing and Capturing the Shot
     A. There are three elements that make a good photograph.
          1. Know your subject.
          2. Focus attention on your subject.
          3. Simplify the shot.
     B. Rule of Thirds
          1. Avoids putting your subject dead center of the frame.
          2. Divide your frame into three equal rows and columns.
          3. Place your subject dead center then move your camera
              left, right, up, down until your subject is off center.
     C. Creating Kinetic or Static Photos (my personal terms)
          1. A Kinetic photo is one that shows not only energy,
              but can shows emotion as well.
              a. Key elements of a kinetic photo are angle of camera,
                  lighting, color, posture or movement of subject.
              b. Photojournalism and Candid styles are good
                  representations of kinetic photos.
          2. Static, or traditional, are your classic posed shots with
              frozen smiles and uneasy postures or stock photos.
              a. Static photos are the conditioned response
                  to the camera and flash.
              b. Portraits, Group and Weddings are good
                  representation of static photos.
          3. No matter how you shoot always try and make your
              subjects, if they are people, feel comfortable in front
              of the camera. Talk to them, make them laugh and put
              them into a more relaxed state of mind.
     D. Photographing People and Groups
          1. When shooting people, using a 3/4 or 2/3 turn is much
              more appealing and adds impact. Also, having them
              tilt their head down will dramatically increase the
              photo’s appeal.
              a. The reason for the 3/4 or 2/3 turn is because a person’s
                  face is not symmetrical and a head-on shot could look
                  off balance.
              b. Be sure to check your lighting so there are no deep
                  shadows on the face unless, of course, that’s what
                  you are going for. Raccoon eyes anyone?
          2. During a group photo the same rule can apply, just use
              the 2/3 turn of the head to show more of the faces.
              a. If at all possible, try and stagger the group to
                  show interest.
              b. Be very aware of the different heights and skin tones of
                 your group. This could cause a visual unbalance in the
                 resulting print.
          3. For both shots, also play around with different angles and
              the camera can be rotated and titled. Try and stay away
              from the static photo. Unless of course you have assistants
              that can hold lights, reflectors, and diffusers.

Recommended Reading
1. Digital Photography Simplified by Gregory Georges
2. 50 Fast Digital Camera Techniques by Kevin L. Moss
3. The Digital Photography Book by Scott Kelby
4. Understanding Exposure: How to Shoot Great Photographs with
    a Film or Digital Camera by Bryan Peterson

Websites
www.nyip.com - New York Institute of Photography Free Tutorials
www.adorama.com - Equipment and Free Tutorials
www.photoflex.com - Equipment and Free Tutorials
www.photovisionvideo.com - DVD Tutorials

Ok, that will bring us to a close on this 4 part series. I really hope this has answered any questions or even peaked you interest in photography. Please remember this does not even scratch the surface of everything that goes into taking that perfect shot. And as always, feel free to shoot me a question or two. I will be glad to answer them.

Now, where do we go from here? I know how sad you must be thinking these photo post are over, but fear not, I will continue with helpful lessons one technique at a time. So keep watching for new posts and thanks for reading.

Friday, January 29, 2010

The Basics of Digital Photography: Part 3

Ok, I slipped up and forgot to post on Wednesday, my bad. Here's part three of this blog series. This goes into much more detail on terms and functions of the camera. Once you've read this post, you will more than likely be very confused. There's a lot of basic info here that only scratches the surface of getting the proper exposure. If you find this confusing, let me know in a comment or email and I will answer as soon as possible. Enjoy.

III. Getting the Proper Exposure
      A. Exposure Control - White Balance, Aperture,
           Shutter Speed, & ISO
           1. White Balance - uses the scenes whitest point
               for color calibration.
               a. Most cameras have these white balance
                   settings; Auto, Sunny, Cloudy, Shade,
                   Tungsten, Fluorescent, Flash, Temperature
                   and Custom.
               b. White and Gray Cards can help in achieving
                   a proper white balance.
            2. Aperture - a collection of plates that control
                how much light reaches the sensor.
                (Landscape & Portrait Mode)
                a. The larger the number the smaller the hole,
                    the greater the depth of field.
                b. The smaller the number the larger the hole,
                    the shallower the depth of field.
                c. Setting the aperture is usually done by
                    adjusting a ring on the lens; however,
                    with today's technologies most
                    adjustments are done in camera.
                d. Settings are defined by the letter f/
                    followed by a number. Ex. f/16
            3. Shutter Speed - controls the length of time
                light hits the camera sensor. (Sports & Night Mode)
                a. Usually measured in seconds, the shutter
                    can be left open for several minutes for
                    night photography.
                b. Fast shutter speed will freeze motion,
                    while a slow speed can show motion.
                c. Technique know as "panning" allows the
                    photographer to keep his subject in focus
                    while the background is left blurry.
                    This should be done with the use of a tripod.
            4. ISO - International Standardization Organization -
                Sensor or Film Speed
                a. Used to measure light sensitivity for the sensor.
                b. ISO is defined by numbers 50, 100, 200, 400 and
                    doubles as it increases, 800, 1600, 3200, 6400.
                c. The lower the number, the less sensitive the
                    sensor is to light.
                d. As with film, when using a faster ISO, care
                    should be taken to avoid digital noise or grain
                    when using film.
                e. Digital noise is the combination of electric
                    fields generated by most of today’s electronics
                    and the information being recorded too fast
                    on the sensor.
        B. How to focus your camera.
            1. Manual or Auto Focus
                a. Auto Focus requires you to press half-way
                    down on the shutter release to see where
                    you’re focusing.
                b. There should be a set of either focusing
                    dots or some type of cross-hair used to
                    focus your subject.
                c. Now your camera should either beep or
                    flash to let you know that you are in focus.
                    Although some cameras will flash to let you
                    know what is not in focus. This is typically
                    on more advanced cameras.
            2. Manual focus will allow to control where you
               focus and give you more creativity with the shot.
       C. Using the On Camera Flash
           1. Only use the flash when absolutely necessary.
               a. Use the flash in low light situations when a
                   tripod is not available.
               b. Use as a fill flash to help light certain areas
                   of your subject.
           2. The On Camera Flash produces harsh and
               unflattering light on your subject, as well as,
               throwing a cast shadow on the nearest surface.
           3. The light from the flash might seem bright; however,
               it loses power the further from the camera it travels.
               a. An on camera flash is only good for about 15 to
                   20 feet. This range is known as the Guide Number.
               b. The further the light travels, the darker your
                   background will be as there is less light to reach it.
           4. The Guide Number, simply put, is the power of the flash.
               This is a very simplified explanation; there is a lot more
               to factor in for the true guide number.
      D. Manual Modes vs. Scene Modes
          1. What are the manual modes?
              a. Full manual allows you the control of every aspect of
                  your camera: white balance, aperture, shutter, ISO,
                  focus, etc.
              b. Aperture Priority is the same as full manual with the
                  exception that the shutter speed is determined for you.
              c. Shutter Priority, again same as manual, with the
                  exception that the aperture is determined for you.
              d. Program Mode, in turn, does not allow you to set
                  aperture or the shutter, although, white balance, ISO
                  and various other functions are yours to control.
          2. What are the scene modes?
              a. These modes take the human element out and the
                  camera determines the exposure settings.
              b. For the most part, the scene modes are rather self
                  explanatory and the descriptions for the scene modes
                  are found in your cameras manual.
          3. How to use scene modes creatively.
              a. This will require a lot of experimentation, think about
                  how the exposure settings are used and what scene
                  mode relates to them the closest.
              b. Also know that what one scene mode is designed for,
                  might actually be good for another situation.

That does it for part three. Next week will be the fourth and final post on the basics of digital photography. Thanks for reading.

Thursday, January 28, 2010

First Wedding of the Year

Let me just say we started of this year with a bang. On January 16 we had the honor of being a part of Lindsey and Derek's wedding. And what a wedding it was, absolutely gorgeous. The ceremony was held at the Cathedral of the Immaculate Conception. The one downtown with the huge gold dome. It kinda reminds me of the European cathedrals with its large open space, columns, altar and the intricate details. Then to top it all off, was the white walls, marble floor and the deep blue ceiling. (No seventies orange walls or carpet.) You could not ask for better photography conditions. I mean you could not mess the photos up unless you tried. Once the guests began to arrive and the weddings party took their places it almost had this ethereal feel to it, and then the lovely bride completed the scene. Yep, I'm laying it think, huh? You would have to be there to understand.

Now once the rings were exchanged, vows given and formal photos taken, we headed over to the Cashew for a lively reception. I will admit it was a little dark in there; however, being the professionals that we are, we took same great photos. And of course, it had a winter theme with clear snowflakes hanging from the ceiling, as well as, snowflakes on the cake. There were toasts, tears, and laughter throughout the night. Oh, they also had a dvd slide show playing with photos of the couple as kids to photos of the couple together. It was good.

Ok, enough of my ramblings, here's a small sample of the event with more being shown on facebook. Go enjoy and as always thanks for reading.

You can also view a slideshow of their wedding HERE.


Wednesday, January 20, 2010

The Basics of Digital Photography: Part 2

Now, it's time for the second part of this four part blog. This can be some of the trickiest areas when it comes to digital photography: the terminology. So many sleepless nights can be attributed to things like, PPI, TIFF, RAW, ISO and many others. Hopefully, what I'm providing will help guide you more restful nights. Enjoy and thanks for reading.

II. Digital Terminology
    A. The Pixel and it’s function in the digital world.
         1. Pixel is actually two words combined–
             picture and element.
         2. Pixel is the smallest area of the screen.
         3. The word pixel was first published in 1965
             by Frederic C. Billingsley of JPL, to describe
             the picture elements of video images from 
             space probes to the moon and Mars. (Wikipedia)
        4. Megapixels - one million pixels
           0.3 Megapixels = 640×480
           0.5 Megapixels = 800×600
           1.0 Megapixels = 1280×800
           1.3 Megapixels = 1280×1024
           1.7 Megapixels = 1680×1050
           2.3 Megapixels = 1920×1200
           3.1 Megapixels = 2048×1536
           4.1 Megapixels = 2560×1600
           5.2 Megapixels = 2560×2048
           6.6 Megapixels = 3200×2048
           7.7 Megapixels = 3200×2400
           9.2 Megapixels = 3840×2400
           11.3 Megapixels = 4200×2690

     B. Pixels and Printing
         1. How pixels translate into printing a photo.
             3 megapixels = 5x7
             4 megapixels = 8x10
             5 megapixels = 11x14
             6 megapixels = 13x19
             8 megapixels = 16x20
            10 - 12 megapixels = 24x36


        2. The mysteries behind resolution 
            from screen to press.
            a. Pixel Per Inch (PPI) & Dots Per Inch(DPI)
                1) They translate the same when it comes 
                    to resolution.
                2) PPI is screen & DPI is press.
                3) So 300 ppi is the same as 300 dpi.
                4) 150 ppi is everyday printing, 200 ppi is 
                    high quality printing and 300 - 600 ppi is
                    professional grade.
            b. Photo printers might say they have a resolution
               of 4800x3600; however, that is actually the dpi
               that runs the length and width of the photo 
               being printed.
      C. The Digital Sensor
           1. The sensor chip is what replaces the film
               negative for recording light.
           2. Complementary metal–oxide–semiconductor
               (CMOS) is the technology that allows a photo
               to be recorded digitally and then written to a
               media device such as a memory card.
           3. Depending on the CMOS system being used
               will determine how much of your image will 
               be recorded and how fast that image can be 
               written to the memory card.
               a. This is a huge variable when it comes to
                   photojournalists, event photographers and
                   sport photographers.
               b. The faster the better and the more detail.
       D. Most Common File Formats
           1. JPEG - Joint Photographic Experts Group 1986
               a. Smallest file size and most common also
                   extremely compressed.
               b. Lossy file type which will lose data at each
                   compression or save.
               c. Good file type to use for minimal or no 
                   post-production work.
           2. TIFF - Tagged Image File Format
               a. A larger file size that has little or
                   no compression.
               b. Lossless file type that will not lose data
                   at each save.
               c. Best file type to use for less
                   post-production work.
           3. RAW image file or DNG - basically it’s
               a digital negative.
               a. This a rather large file with no 
                   compression at all.
               b. Lossless file type that will not lose
                   data at each save.
               c. The closest thing to a film negative.
               d. Captures every detail of the subject.
               e. Post-production work is required for
                   this format.
         E. Memory Cards
             1. Used to store the data from the CMOS.

             2. Various types of memory cards.
                 (i.e. Compact Flash, Memory Sticks, 
                  Secure Digital and xD)
             3. Cameras use a variety of cards depending
                 on manufacturer.
             4. Sizes range form 32MB to 16GB.
             5. The only main difference is that a compact flash
                 card can write faster than the others.

Alrighty then, that will do it for part two. Stay tuned for next weeks blog on getting that proper exposure. Ciao.

Wednesday, January 13, 2010

The Basics of Digital Photography: Part 1

Before we get into this weeks blog, I need to make a few correction from the previous one. Mainly I'm only going to be posting a weekly blog about photography, not the fore mentioned twice a week. Reason for this is so I have enough stuff to write about. Now with that said, on with the blog.

The Basics of Digital Photography: Part 1

About two years ago, I gave a small presentation about digital photography at the University of Saint Mary in Leavenworth, and thought I would share the same material with you. Now don't you feel appreciated.

The following information will be presented in four parts and is intended for beginners or hobbyists.

I. The many kinds of cameras—digital & film
   A. The Single Lens Reflex (SLR) camera
        1. Main advantage is creative control.
            a. Ability to change lenses and exposure settings.
            b. The camera most professionals use.
        2. Another advantage is a faster and more advanced
            sensor chip.
            a. Great for high-speed photos and crisper detail.
            b. Also has the ablility to clean dust particles for the mirror.
        3. Many levels available on the market today in various
            price ranges.
   B. Fixed Lens SLR camera
        1. Has some of the same features as a true SLR.
            a. Usually has creative modes and full manual modes.
            b. Cannot change lens and therefore reduces flexibility.
        2. Known to other professional photographers as a
            "point-n-shoot on steroids."
   C. The Point-n-Shoot camera
        1. A fully automatic camera with a myriad of specialized
            settings and functions.
            a. Scene Modes: landscape, portrait, night scene, macro, and
                various others depending on manufacturer.
            b. Usually gives control of image size.
            c. Some allow for different file formats:
                JPEG, TIFF, RAW, etc.
            d. There’s also a chance that the ISO and white balance
                can be changed.
        2. There is really not much room for creative photography
            unless you can think outside the scope of your camera.
            a. Lack of choosing aperture and shutter speed does not
               allow for either a greater depth of field or a
               shallow depth of field.
            b. Limited focal length and angle of photo due to the lack of
                lens changing. Although, there are lens attachments that
                can create a wide angle or telephoto feel.
        3. The sensor chip is typically not as fast as a SLR, but with
            current advancements in technologies it is quite robust.

Okay, that should get you started in choosing the right type of camera for you or give you some insights o the camera you already own. If you have any questions, leave comments and I will answer them.  Thanks for reading.